Approving Timesheets
As a manager in EdWard, you are responsible for reviewing, approving, or rejecting timesheets for your team. This guide walks you through accessing employee timesheets, reviewing entries, providing feedback, and approving or rejecting time records.
Accessing Employee Timesheets
When you log into EdWard, you’ll see an additional menu item:
How to View Employee Timesheets:
- Click on “Employees” in the left-hand sidebar.
- You will see a list of employees with active timesheets for the current pay cycle.
- Click on an employee’s name to open their timesheet details.

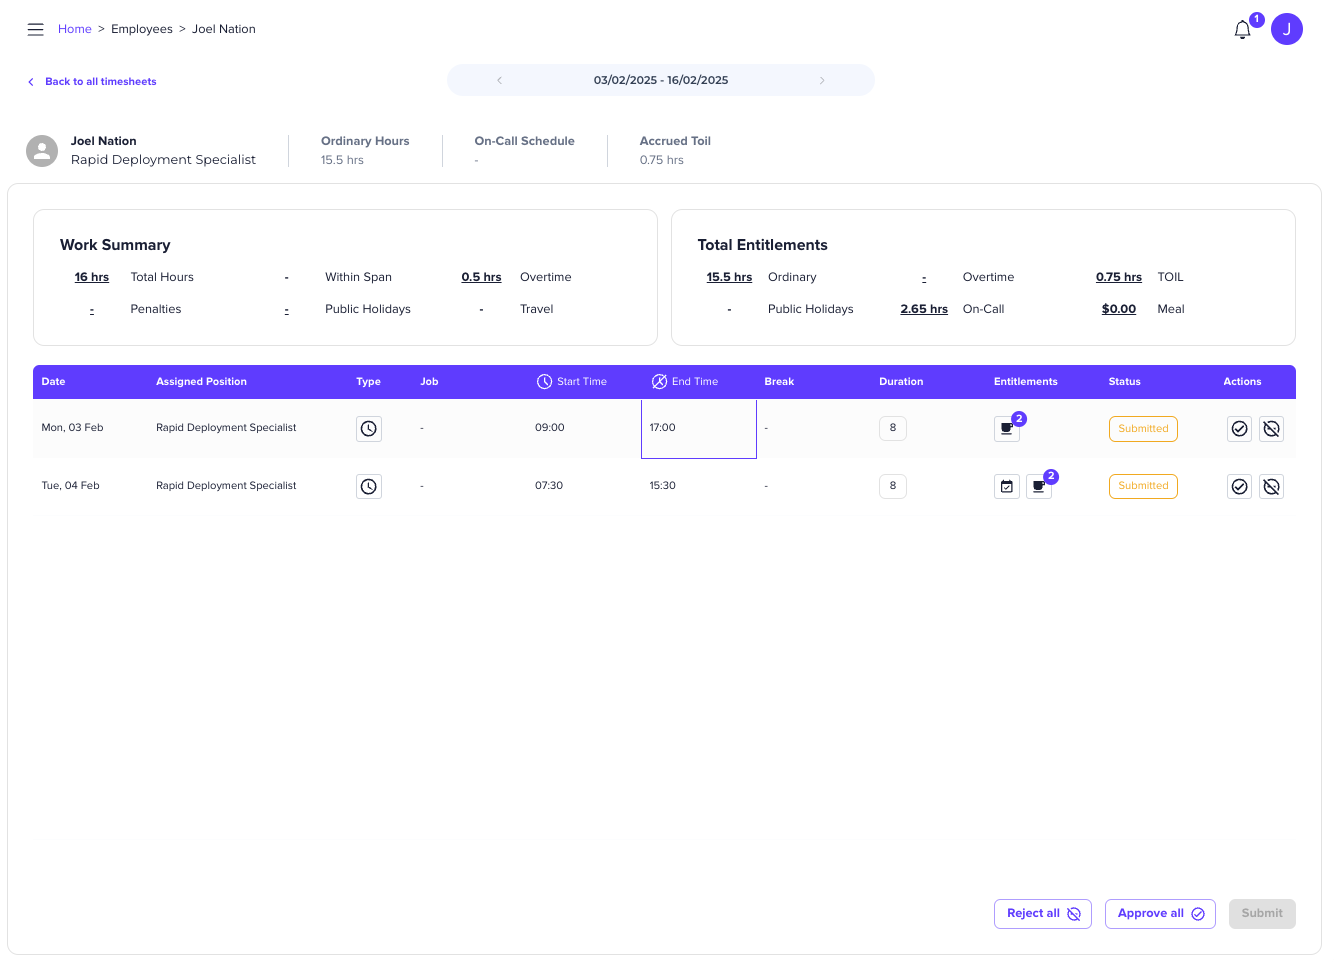
Reviewing an Employee’s Timesheet
Once inside an employee’s timesheet, you will see:
- Summary information at the top, including total hours worked, overtime, entitlements, etc.
- A table of all timesheet entries recorded for that employee in the selected pay period.
Multiple Roles & Filtering by Role Position
- If an employee has multiple roles, all timesheet entries will be displayed.
- However, you can only approve or reject entries for roles you manage—entries for other roles will be read-only.
- Use the role selector under the employee’s name to filter timesheet data by role position. This will only be shown if the user has multiple roles
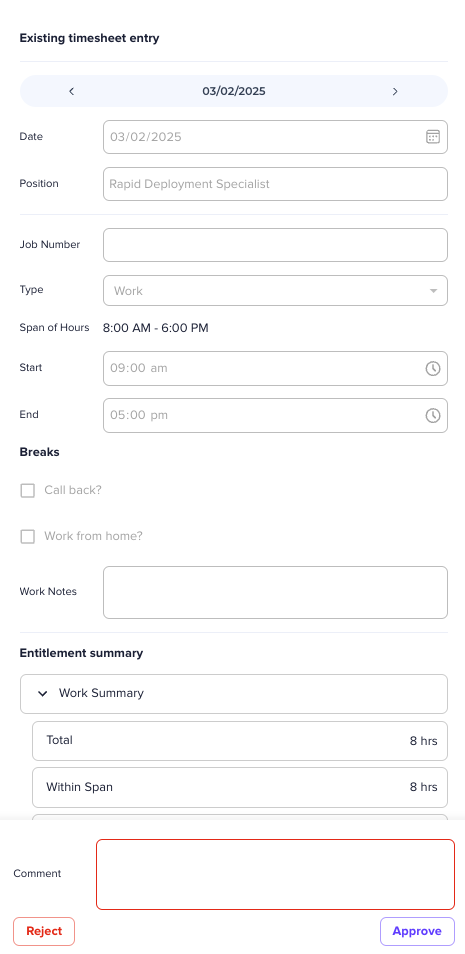
Reviewing Individual Timesheet Entries
To view the details of a specific timesheet entry:
- Click on any entry in the timesheet table.
- A side drawer will open, displaying:
- The exact details entered by the employee (start time, end time, breaks, etc.).
- An Entitlement Summary, which you can expand to understand how pay was calculated.
- A comment box at the bottom where you can provide feedback.
Note: Managers cannot edit timesheet entries—only employees can make changes. If an entry is incorrect, you must reject it and provide a reason.
Approving or Rejecting Timesheet Entries
There are three ways to approve or reject timesheet entries:
Option 1: Bulk Approval or Rejection • At the bottom of the screen, click “Approve All” or “Reject All”. • If you have added comments to individual entries, those will be saved when rejecting all entries.
Option 2: Approve or Reject Individual Entries • Click an entry in the timesheet table, provide feedback in the comment box, and click “Approve” or “Reject” in the side drawer.
Option 3: Inline Approval/Rejection from the Table • Use the Approve (✔) and Reject (✖) buttons in the Actions column for each timesheet entry. • Once all required approvals/rejections are made, click “Submit” at the bottom.
After reviewing all timesheet entries:
- Click Submit to finalise your approvals and rejections.
- Approved timesheets will be sent to payroll for processing.
- Rejected timesheets will be returned to employees for correction.
Reminder: Employees will only see comments on rejected entries. Approved entries move forward automatically.
Key Features and Notes
- Access timesheets via the “Employees” tab.
- Review timesheet details, including entitlement summaries.
- Approve or reject entries individually or in bulk.
- Use comments to provide feedback on rejected entries.
- Submit approvals so payroll can process valid timesheets.
By following these steps, you can efficiently manage employee timesheets and ensure accurate payroll processing.